When and When Not to Drain Your Ice Chest
In the quest to keep things cool on extended outings, a great debate arises from the ashes of the campfire: what to do with the ice melt water in the cooler? Keep it or drain it?
Even physics gurus argue about whether or not to drain the water. Here’s what everybody seems to be able to agree on:
- Water freezes at 32F*
- Hot things melt ice faster than cold things do
- Water is more flexible than ice
- Food gets soggy in water
- Air heats and cools faster than water does
- Big pieces of ice melt slower than small pieces of ice
- When sharing the same space, hot things and cold things will eventually become the same temperature
Let’s break it down from there.
Reasons not to drain the water from your cooler
As long as there is still ice in the water, the contents in the water will stay as cold as the water. If you need the contents of your cooler to stay at or near frozen, this will be a problem. If, however, you only need the cooler to serve as a refrigerator, 40ish degrees works well to keep milk from spoiling, chocolate from melting, sodas from getting warm, and sandwich meat from cultivating bacteria. On hot days at the campsite, this is a victory.
Cold water stays cool longer than empty air within the cooler would. In other words, cold water surrounding the contents of your cooler is preferable to warm air surrounding them. Items not in the cold water will warm more quickly than items in it. The moral of the story? Keep the water as long as there is ice in it (and your food is sealed in containers that protect it from sogginess).
So if you’re nearing the end of your trip and the ice has begun to float in its own melt, don’t drain the cooler yet. The ice cold water will keep things cool better than a mostly empty (filled primarily with air) cooler with minimal ice.
Reasons to drain the water from your cooler
The arguments for draining the water from your cooler are also valid. There is a time for everything. Some of the times you definitely want to drain the water from your cooler are:
- When you don’t want to drown the contents. Certain containers fare better than others when surrounded by flood waters. Bread bags with twist ties don’t. Neither do individually wrapped slices of cheese.
- When you know you will have to carry the cooler from one place to another. The slosh factor as well as the added weight of the water in the cooler could be a deterrent to keeping the water. It really depends on how far you carry it, how much ice is in the water, and how long you need the contents to stay cold. (Side note: if you use a Bison Hauler, the weight factor can be disregarded.)
- When the water in your cooler has been contaminated by raw meat or some other spillage. Drain the water, empty the cooler, wash the cooler, rinse the outside of the cooler contents thoroughly, and start over with a freshly packed ice chest. The hassle is worth your health.
- When you have enough ice available to refill the entire cooler. In that case, drain the water and refill it with ice like you did when you initially packed the cooler. Ice melts faster in water. If you have enough ice to refill, then it’s a moot point. If you only have a little bit of ice, just add it to the water and reference the section above.
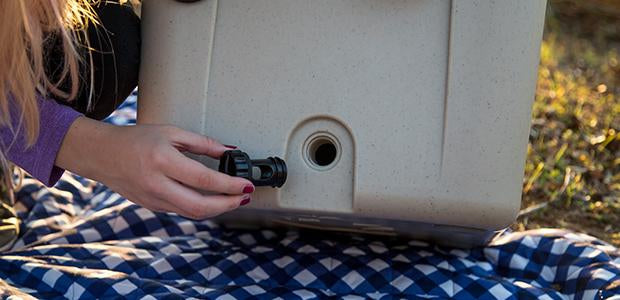
- When your trip is over and you’re storing the cooler. Seriously. There’s no telling what would grow in there. Drain that bad boy! Shameless plug (pun intended): Bison’s GEN2 coolers have larger drain plugs with a hollow interior so they drain faster without removing the plug entirely.
How to keep the contents in your cooler cold longer
The question you really want to know is how to keep the contents in your cooler cold for as long as possible. Right? We have five suggestions for you:
- Top the cooler off with ice. The more ice, the merrier. Fill up that bad boy.
- Use ice blocks instead of bagged ice. The bigger the piece of ice, the longer it takes it to melt. Ideally you could freeze an entire layer of ice in the bottom of the cooler, but most coolers won’t fit in a residential freezer so that’s not a viable option. You can, however, put a layer of Chillin’ Brew IcePaks in the bottom of your cooler. These ice blocks can be refrozen and used multiple times, keeping your cooler contents dry and saving you money on ice in the long run.
- Keep the cooler lid closed and the cooler in the shade. (That’s right. Two suggestions for the price of one. You’re welcome.) The goal is to keep the warm air from reaching the ice. The more often someone opens the cooler lid, the more warm air is allowed to get in and compromise the ice. Only open the cooler when you know exactly what you want to retrieve from it.
- Pack cold things. Chill the things you plan to put in the cooler before actually packing them in the cooler. This keeps the ice from melting on impact when it comes in contact with the warmer items.
- Use a rotomolded cooler with high quality seals for the best insulation. You know, buy a Bison.
Now you know how to keep your cool when the “to drain or not to drain” debate comes up, and you can back your argument by citing this blog post.

